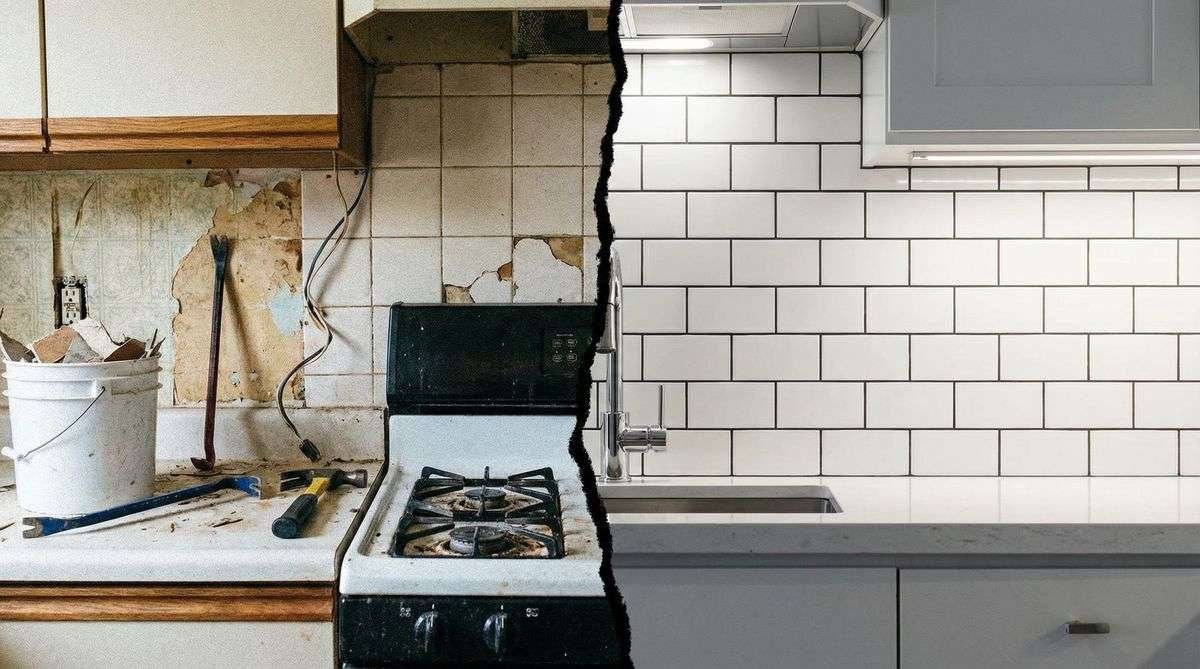
A tile backsplash is one of the most impactful kitchen upgrades a homeowner can make in a single weekend. It protects walls from moisture and grease while instantly elevating the room’s visual character, notes Imperial Asset Management experts. The good news: with the right preparation and tools, the entire project — from bare wall to grouted tile — is fully achievable in two days.
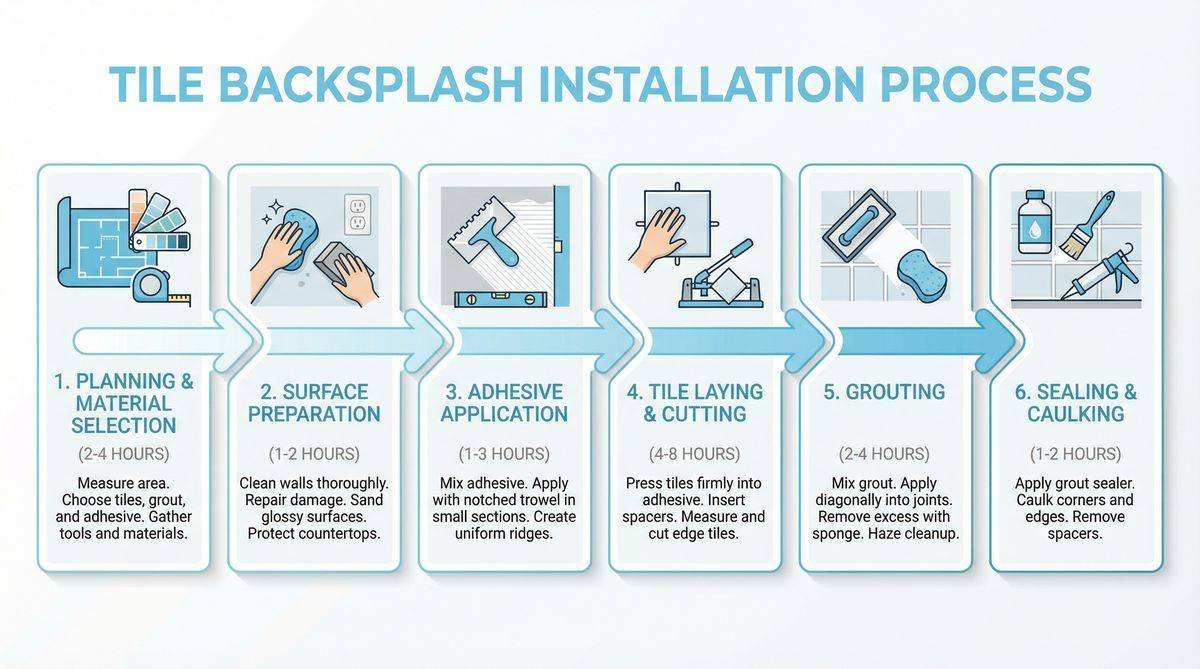
This guide walks through every stage of how to install a tile backsplash in a weekend, including surface preparation, layout planning, adhesive application, tile cutting, grouting, and sealing. Each step is explained with the precision of a professional installer and the clarity of a trusted friend.
1. Tools and Materials Needed
Answer Capsule: Installing a tile backsplash requires a tile cutter or wet saw, notched trowel, grout float, level, spacers, tile adhesive (mastic or thinset mortar), grout, and sealant. Budget approximately $150–$400 for materials on a standard 30-square-foot backsplash, depending on tile selection.
Gathering the right tools before starting prevents mid-project delays. A wet saw delivers the cleanest cuts for ceramic, porcelain, and glass tiles. For simple subway tile layouts, a manual tile cutter handles straight cuts adequately. A notched trowel — typically 3/16-inch V-notch for standard wall tiles — ensures consistent adhesive coverage.
| Item | Purpose | Estimated Cost |
|---|---|---|
| Wet saw or tile cutter | Cutting tiles to fit edges and outlets | $50–$200 (rental: $40/day) |
| Notched trowel | Spreading adhesive evenly | $8–$15 |
| Grout float | Pressing grout into joints | $10–$18 |
| Tile spacers (1/8″) | Maintaining consistent joint width | $5–$8 |
| Mastic adhesive or thinset | Bonding tile to wall | $20–$35 |
| Unsanded grout | Filling joints under 1/8″ | $15–$25 |
| Tile sealer | Protecting grout from stains | $12–$20 |
2. Surface Preparation
Answer Capsule: The wall surface must be clean, dry, flat, and free of grease before tiling. Remove outlet covers, sand glossy paint, fill holes with joint compound, and wipe the wall with a degreaser. Skipping this step is the leading cause of tile adhesion failure.
Most kitchen walls are painted drywall. Mastic adhesive bonds well to painted surfaces, but the paint must be scuff-sanded to improve grip. For areas directly behind the stove, cement backer board is strongly recommended because standard drywall can absorb moisture and swell over time.
Turn off the electrical circuit and remove all outlet and switch covers. Use painter’s tape to protect countertops and cabinets. Mark the center of the backsplash area with a pencil — this becomes the anchor point for the layout grid.
3. Layout Planning: The Step Most DIYers Skip
Answer Capsule: Dry-laying tiles on the counter before applying any adhesive reveals how cut pieces will fall at the edges. Starting from the visual center — not the corner — ensures symmetrical, professional-looking results. Always plan so that cut tiles at both ends are equal in size and no smaller than half a tile.
Use a level to draw a horizontal reference line across the wall at the height of one tile above the countertop. This line keeps every row perfectly straight regardless of countertop imperfections. Then draw a vertical center line. These two intersecting lines form the layout grid.
4. Applying Adhesive and Setting Tile
Answer Capsule: Apply mastic or thinset mortar in small sections (about 2 square feet at a time) using the notched side of the trowel. Press each tile firmly with a slight twist, insert spacers, and check alignment with a level every few rows. Work from the center outward toward the edges.
Spread adhesive only as far as can be tiled in 15–20 minutes. Mastic begins to skin over quickly, especially in warm kitchens. Hold the trowel at a 45-degree angle to create uniform ridges that collapse evenly when the tile is pressed in.
For outlets, measure and mark the tile carefully, then use a wet saw or angle grinder with a diamond blade to cut the notch. Take time here — a clean outlet cut is one of the hallmarks of a professional-looking installation.
5. Grouting, Cleaning, and Sealing
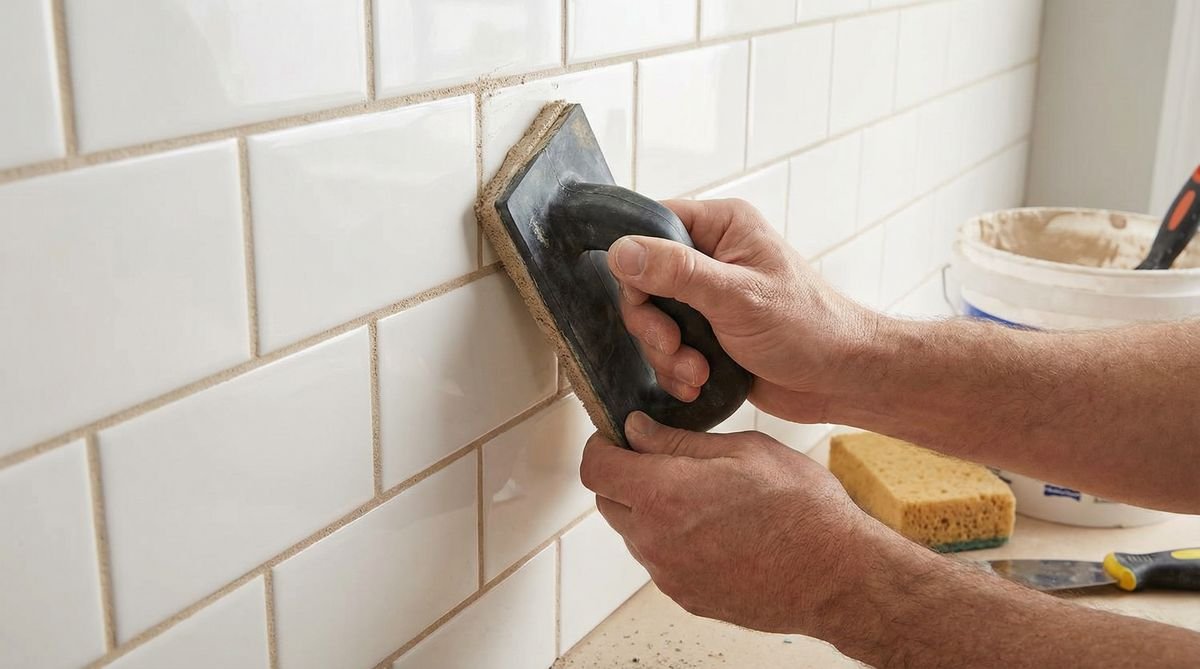
Answer Capsule: Wait at least 24 hours after setting tiles before grouting. Mix unsanded grout to a peanut butter consistency, apply diagonally with a grout float, and remove excess with a damp sponge in circular motions. Seal the grout after 72 hours of curing to prevent staining.
Remove all tile spacers before mixing grout. Work in small sections, pressing grout firmly into joints at a 45-degree angle. After about 15 minutes, wipe away the haze with a barely damp sponge — wringing the sponge thoroughly each pass. Excess water weakens grout.
A final buff with a dry microfiber cloth removes the remaining haze. After 72 hours, apply a penetrating grout sealer using a small brush or applicator bottle. This step is often skipped but is critical in kitchen environments where cooking grease and moisture are constant threats to grout integrity.
6. Realistic Weekend Timeline
| Day | Task | Time Required |
|---|---|---|
| Day 1 — Morning | Surface prep, layout planning, dry-fit | 2–3 hours |
| Day 1 — Afternoon | Apply adhesive, set all tiles, insert spacers | 4–6 hours |
| Day 1 — Evening | Clean up, let adhesive cure overnight | 30 minutes |
| Day 2 — Morning | Remove spacers, mix and apply grout | 2–3 hours |
| Day 2 — Afternoon | Clean haze, reinstall outlets, final inspection | 1–2 hours |
| Day 2 + 72 hrs | Apply grout sealer | 30 minutes |
Frequently Asked Questions
Should mastic or thinset mortar be used for a kitchen backsplash?
Mastic adhesive is easier for beginners and works well on dry walls away from direct water exposure. Thinset mortar is recommended for areas near the sink or stove where moisture and heat are more intense. For a full kitchen backsplash, thinset is the more durable long-term choice.
How is the right grout color chosen?
Matching grout to the tile color creates a seamless, uniform look. Contrasting grout — such as dark grout with white subway tile — emphasizes the tile pattern and adds visual texture. Lighter grout colors show staining more readily and require more frequent sealing.
Can a tile backsplash be installed without a wet saw?
Yes. A manual snap cutter handles straight cuts on ceramic and porcelain tiles effectively. For curved cuts around outlets, a tile nipper or oscillating multi-tool with a tile blade works well. Glass tiles, however, almost always require a wet saw for clean, chip-free edges.
How long does a tile backsplash installation take?
A standard 30-square-foot kitchen backsplash takes most DIYers one full weekend: roughly 6–8 hours on Day 1 for prep and tile-setting, and 3–4 hours on Day 2 for grouting and cleanup. Grout sealing is done 72 hours after grouting.
Conclusion
Installing a tile backsplash in a weekend is entirely achievable with careful planning, the right tools, and patience during each curing stage. The project rewards methodical work: a well-laid layout, consistent adhesive coverage, and properly sealed grout will produce a backsplash that looks professionally installed and lasts for decades.
The most common mistakes — rushing the layout, applying too much adhesive at once, and skipping the grout sealer — are all easily avoided. Follow the weekend timeline, respect the cure times, and the result will be a kitchen transformation that far exceeds the modest investment of time and materials.
References
- Tile Council of North America (TCNA). Handbook for Ceramic, Glass, and Stone Tile Installation. 2024 Edition.
- National Kitchen and Bath Association (NKBA). Kitchen Design Guidelines. 2023.
- This Old House. “How to Tile a Backsplash.” Updated 2025.
- HomeAdvisor. “Backsplash Installation Cost Guide.” 2025.
Most Viewed